Monday, December 2, 2013

December Daily Album - 2013 DAY 1

So it has been a whirlwind of a year... but we are coming to a close.  It is time for the December Daily albums to flood the internet.  I have wanted to do one of these for several years and never really jumped on the tracks for it... this year is different.  I have most of my foundation pages set I have now completed day 1!!!  (Gotta start somewhere right?)

Let's take a look at what we have so far:

Here are the foundation pages for the intro page, and page 1.
For this album I am using an 8x8 American Crafts red album.  With a plethora of page inserts and sizes.

For the introduction page above I used a Martha Stewart red page divider.  You can find these at any of the office supply stores.  I think I got mine at Office Max.  This is the 5x8 size all I had to do was repunch the holes to make it fit the binder.  (Something I am finding myself doing a lot in this process) 

The first page I used 6x8 page protector from Simple Stories.  I added in the December Calendar page from Bo Bunny's "Misc Me Magic Elf Journal Pages" 

 I liked the backside of Bo Bunny page so I am keeping it just that for the Day 1 pic & journaling.

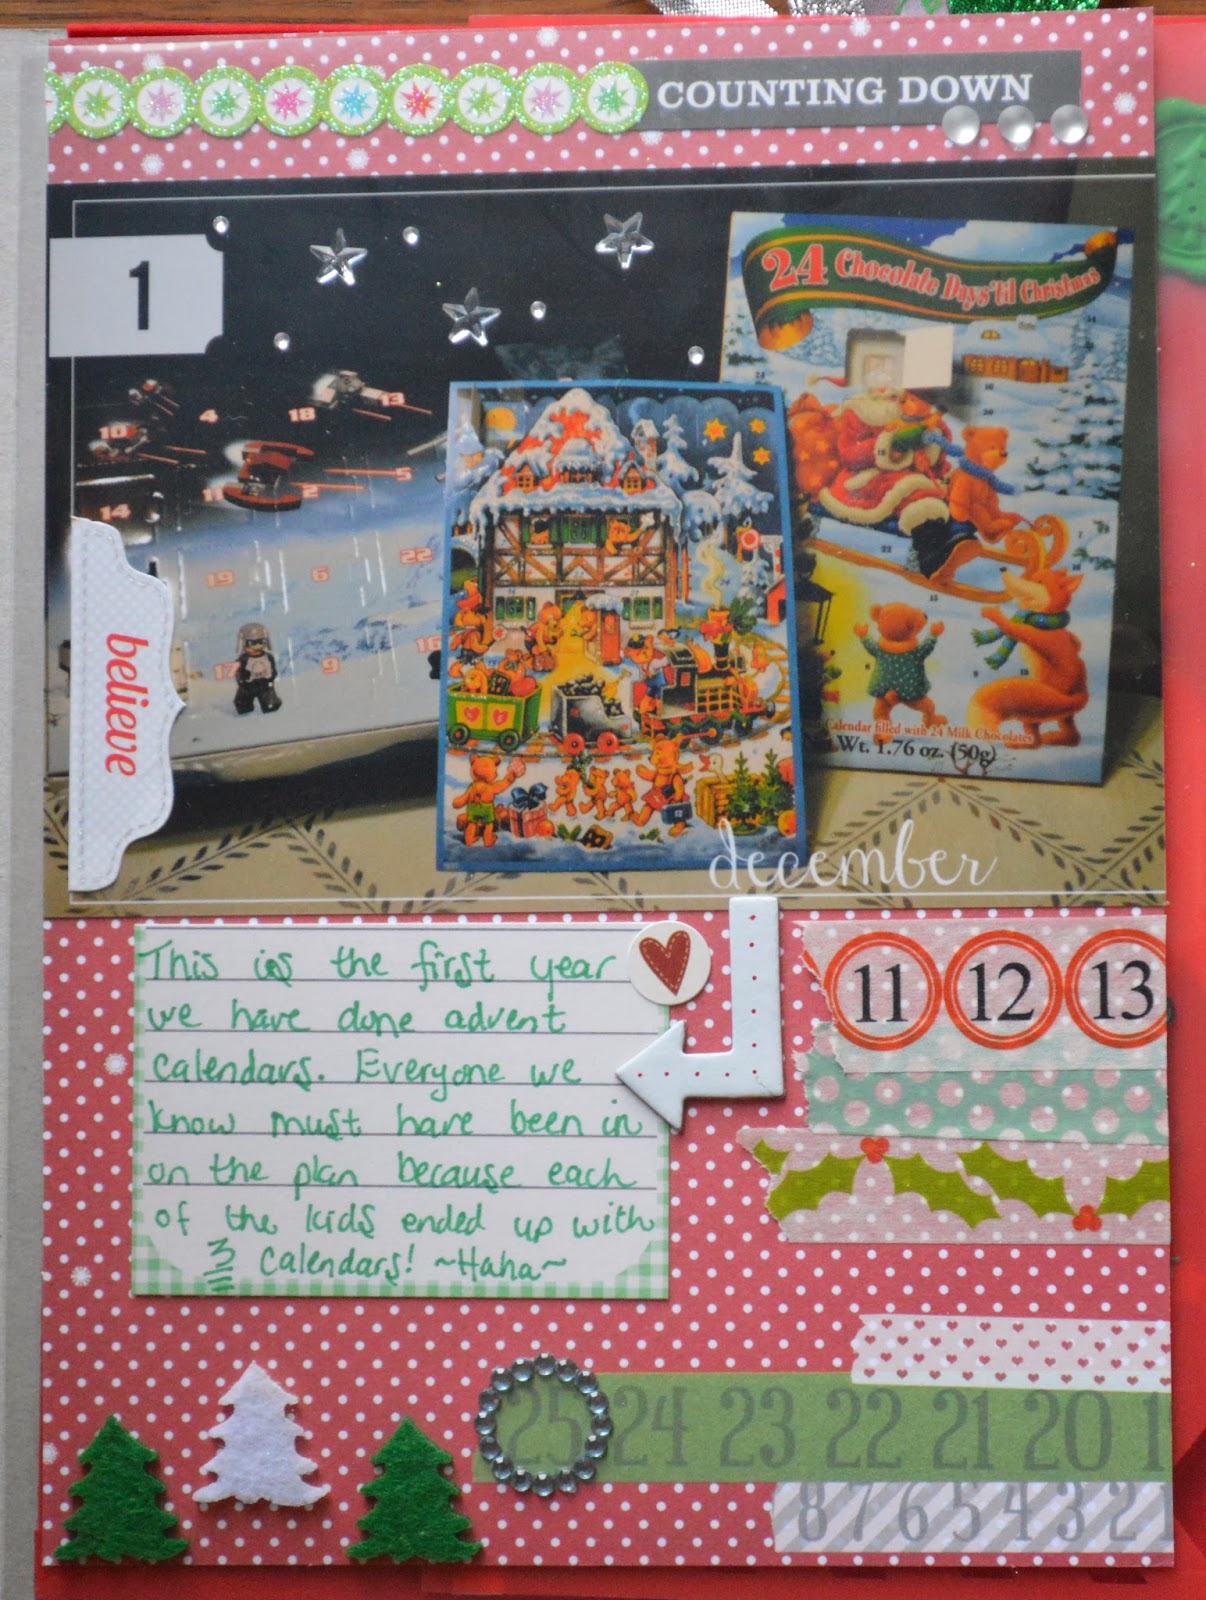
Here are the completed pages for Day 1 (plus the intro page):
I was not quite all inspired to do the cover yet so it is still bare... soon maybe on a slow scrap day I can get that done!

 For the front side I used Stampin UP new Chevron punch and punched the bottom of the plastic divider.  Added In Doodlebug boarder sticker, a freebie from http://scrapbookprintables.wordpress.com, some Maya Road photo corners, ribbons from Doodlebug and Michaels crafts store, the holly and berries are from the Dollar store, and the rhinestone stars are from Michaels dollar rack section.  I used Tim Holtz tiny attacher for the ribbon at the top and just stapled it to the front.
 The backside of the intro has: Magic mesh (dark green), Target dollar store rhinestones on the side of the word strips from Chic Tags.  The envelope seal is a sticker from the $1 deals from JoAnn's.
 For Day 1: I added in a pic and story of our advent calendars.  The overlay is a freebie from A Vegas Girl at Heart, the sticker boarder above is from Doodlebug boarders as well as the "believe" tab on the photo and the word strip again from Chic tags.  I added in the left over stars from the front of the intro page to the pic and some rhinestones by Recollections.  Below the pic I added in a half journal card from Gossamer Blue Life Pages kit.  The arrow is Studio Calico, the trees are felt trees from Michael's $1 rack.  The washi tape on the right of the page are from Teresa Collins "Santa's List" collection and My Minds Eye "Magic" collection.

 Here I used washi tap from the OH Deer Me (by freckled fawn) embellishment kit.  I ran it up both sides of the fold (front and back) to create a boarder and hole punched that so I could place it in the album.
Here is a photo of the letter so you can see it is able to be open and read without any hassle.

Finally here are the foundation pages for Day 2 and 3&4 (on one page).  As soon as I have their story and finished pages I will post them as well!

 This is an 8x8 page protector from We r, from Target.  The top 2x8 insert is a cut paper from Teresa Collins "Santa's List" 6x6 notepad.  And the 4x6 title card is from Simple Stories.  The bottom green grid card is from We r notepad from Target as well.  Becky Higgins had a special on HSN for these overlays (part of the Just Add Color Collection).
These are all the backsides of the same products listed above.

Thanks for looking!

Friday, March 1, 2013

Project Life week 2

So a quick review of the weeks.  I am feeling very motivated to keep this going.  I have a great process that is keeping my time involved a little less than last year.  Before I start a week I pick out my Pocket Page Protectors and then label each "slot" with what I am going to put into it.  I then print out all the pictures I need and gather all the ephemera.  Finally I can focus on the scrapping and getting it all inserted.  It seems to work well.  Last year I noticed that some weeks were taking me nearly 2-3 days to complete (minus the time I was at work and doing family stuff).  Now I can complete a week in a matter of hours... 1 evening after the kids are in bed.   Which is currently hopeful because I am about 3 weeks behind.  *Sigh*  I guess that is the glory for being on vacation for a week and having a fulfilled and happy life! :)

With out further ado.... here are the last couple of weeks! 

Week 2: 

For this week I added in some tickets from movies, a filmstrip of pics we took at the movies in a photo booth.  Some screenshots of the weather this week.  It went from 61+ to the teens in the middle of the night!  YUCK!! I wrote out our entire week schedule on a 4x6 card from the Clementine edition of PL by Becky Higgins. And I used my Silhouette to cut the "Week 2" title.   I am providing that freebie link for those Silhouette files here.  Here is a preview of the file: 


  The right side of this week includes a rare Facebook update from the husband.  As well as a scanned drawing from my son and a cute random note I found on the back of one of his homework pages "I like my mom".  I included a picture of the process I discussed in the opening of
this post with the organization tips I am loving to keep me on the "get it done" track.  I used some of the Cobalt and Baby for Him Cards by Becky Higgins.

Lastly here is a 6x12 insert of a cute story from my son using a clipped 3x4 card as the title from Clementine edition of Becky Higgins,  some Reminisce washi tape and a shaped clip from Staples.

Wednesday, January 2, 2013

New Year, New Project Life

Well I feel like I am starting the year off on a positive note.  My title page is done... whew!  Let's hope that I can keep up this pace all year and then there won't be the pain and agony of being so far behind like last year!  Enough chatter time to show the pages off.... I am really excited about this!  I feel like it is unique and fun and kicking the project off just how I want it!  

I used the Becky Higgins Pocket Page A protectors for this title page.  I really love the idea of all of us holding on to numbers coordinating with the year "2013" in the center.  


Here is a close up view of my "shaker" window.  I used a canvas heart (by Basically Bare) and Chit Chat (by Tim Holtz idea-ology) stickers to outline my title "Our family, our memories, our story."  Behind that I added in some confetti from New Years and then sealed the top by sewing it closed.


Here is a close up view of my new favorite photo of me and my husband playing with sparklers.  I used the following settings on my Nikon D3200 camera: TRIPOD!!  Shutter speed 2" f/stop 5.6, White balance to fluorescent.  If you are doing longer words or numbers then adjust the shutter speed for longer.  Have the subjects stand very still, as you can see we did not, but I am ok with that.  Lastly WRITE ALL NUMBERS AND LETTERS BACKWARDS!! 

 Share your pages with me... join our Facebook group for some good cheerleading, ideas, and great friends!  Here we root each other on especially in times of falling behind or stress, share ideas when we get stuck and for pages, and just chat.  We have some great gals making freebies pretty often... how could you not!!!?