Come on sing it with me now?? Who has carols pumping through the house and their tree up? Now that we are in the spirit let's round the bend and get our cards done and out the door!
I'm BACCCCKKKK!!! And today I bring a quick tutorial on how to add and change out drop shadows! In this tutorial I am using CS6 version, in PSE you can follow along in most versions until I separate the shadow onto a new layer. In older versions of PSE you cannot put the shadow on it's own layer but you can still change the color... and of course I will show you how!
To get started open up the template for the card #10 given to you in the email.
1) Choose a chunky or bold font to type out your title. Here I used Cooper STD, which is free.
2) I typed each letter of "merry" on it's own layer, so that I could change the colors or add pattern as I desired without changing the whole word.
3) Use the tutorial on alignment and distribution from Dec 2nd (here if you missed it).
4) Now I used papers from the kit this card was made from because I like the texture added in. But you can easily just change the color of the letters to suit your needs.
5) Now that each letter is complete with pattern paper, you can merge it and make it into one word.
6) First you need to rasterize the type and then make them all one layer. Select ALL the layers of the word you are working with.
7) Add a stroke to the word. I used size of about 20 here.
Layer --> Layer Style --> Stroke
FOR PSE USERS... HERE IS WHERE YOU CHANGE YOUR COLOR TO MATCH YOUR CARD. CLICK JUST TO THE RIGHT OF THE SIZE LINE AND THAT IS YOUR COLOR CHANGE OPTION.
8) Put the stroke on it's own layer by clicking the word "Stroke" on the layers panel and using the drop down menu that says "Create layer"
9) Once it is on its own layer you can manipulate the color and or add another pattern to it as well.
10) Finally I decided I needed a little more oomph to the word so I added a SECOND stroke to both the "merry" and the stroke outline... only at 7 this time and a green to make them pop.
11) Add in a small drop shadow and you have a beautiful title on your card.
Note: You can do this for more than just words. I repeated this WHOLE process to add an exact matting around the rectangle in the template so I wouldn't have to guess size or alignment! Give it a try! Here is my finished card... Be sure to share yours with us! ENJOY!
It's not to late to share the fun with friends.. get them in on the 12 Days of Christmas cards and envelopes by signing up here.
For this card I used the "Christmas Wishes" Digital kit that can be found in my shop on Etsy here.
This year I have been a very, very, VERY good girl and I want.....
Does this sound familiar? Well let me help you jump start your letter writing for the kiddos with these hand crafted one of a kind "Dear Santa" stationary. Each of them print at 8.5 x 11 and are usable over and over again!
Be sure to send your friends and share the fun.... also post pics of your letters using #dearsantachristmaswishes for your chance to win the WHOLE "Christmas Wishes" kit that I used in creating these letters!
I have had some requests to change titles and dates... so if you are interested in something like that leave a comment and I will do my best to accommodate you as soon as possible!
Hello! Today I am here with my Christmas card for sketch and template #2 on the route for the 12 days of Christmas Cards and Tutorials! Here is the card I made using CS6 digitally with the template and then I printed it out both the card and envelope so they are ready to send off!
In this tutorial I will show you how to use one of my favorite techniques to align your elements and perhaps photos and mats perfectly and quickly every time! I will show you screen shots from PSE 10 since that seems to be the most common program ... enjoy!
We are going to add stars to the circles in the template.
1) So once you open the template and clip your pattern paper to the circles merge the layers for easier movement on the card. (Shortcut CMD + G for Mac Alt + G for PC)
2) Now add the star and drag it over near the circle. As you can probably tell it is pretty difficult to get it to line up perfectly and evenly inside that circle. So here is the secret...
3) Select BOTH layers, the star and the circle embellishment. Now for PSE go to the top where it says "Align" and select the option to "Align vertical centers" from the drop down menu. Repeat and select the "Align horizontal centers" option to make sure it is centered completely inside the circle.
VOILA!
4) Add a little drop shadow to each of the two layers and it is perfect!
*Quick tip: You can do this as well if you have embellishments that need equal spacing. By using the option right next to "Align" the "Distribute" function. This is perfect if you are adding in buttons or something. You can Align them so they are all even along the bottom or top, and then distribute them evenly along a certain space! Great tools for making things even and spaced!
For this I just duplicated one of the circles and made it three.
1) Choose the "Align" menu and align the bottoms of the circles because as you can see they are not even after I copied and moved it.
2) Select the distribute menu now and distribute centers:
EASY right? I love this little trick for adding in buttons or sequins and having things spaced for me so I don't have to do all the zooming and guess work!
For this card I used my brand new "Christmas Wishes" kit available in my Etsy store here.
Thanks for stopping by... if you have friends that want to join in on the fun be sure to have them sign up for the 12 Days here!
WOW!!!! December already?!!??! I cannot believe how fast 2014 has flown by!
This year I am so thrilled to be invited to participate in the WWCSF event! I have a new kit releasing today, Cyber Monday and I am here as part of the blog train freebies to share with you a preview of the kit and a mini sample! I hope that you enjoy it and will check the whole kit out at my brand new Etsy shop here. Please enjoy the freebie and don't forget to leave some love for the other designers as well!
So it has been a whirlwind of a year... but we are coming to a close. It is time for the December Daily albums to flood the internet. I have wanted to do one of these for several years and never really jumped on the tracks for it... this year is different. I have most of my foundation pages set I have now completed day 1!!! (Gotta start somewhere right?)
Let's take a look at what we have so far:
Here are the foundation pages for the intro page, and page 1.
For this album I am using an 8x8 American Crafts red album. With a plethora of page inserts and sizes.
For the introduction page above I used a Martha Stewart red page divider. You can find these at any of the office supply stores. I think I got mine at Office Max. This is the 5x8 size all I had to do was repunch the holes to make it fit the binder. (Something I am finding myself doing a lot in this process)
The first page I used 6x8 page protector from Simple Stories. I added in the December Calendar page from Bo Bunny's "Misc Me Magic Elf Journal Pages"
I liked the backside of Bo Bunny page so I am keeping it just that for the Day 1 pic & journaling.
Here are the completed pages for Day 1 (plus the intro page):
I was not quite all inspired to do the cover yet so it is still bare... soon maybe on a slow scrap day I can get that done!
For the front side I used Stampin UP new Chevron punch and punched the bottom of the plastic divider. Added In Doodlebug boarder sticker, a freebie from http://scrapbookprintables.wordpress.com, some Maya Road photo corners, ribbons from Doodlebug and Michaels crafts store, the holly and berries are from the Dollar store, and the rhinestone stars are from Michaels dollar rack section. I used Tim Holtz tiny attacher for the ribbon at the top and just stapled it to the front.
The backside of the intro has: Magic mesh (dark green), Target dollar store rhinestones on the side of the word strips from Chic Tags. The envelope seal is a sticker from the $1 deals from JoAnn's.
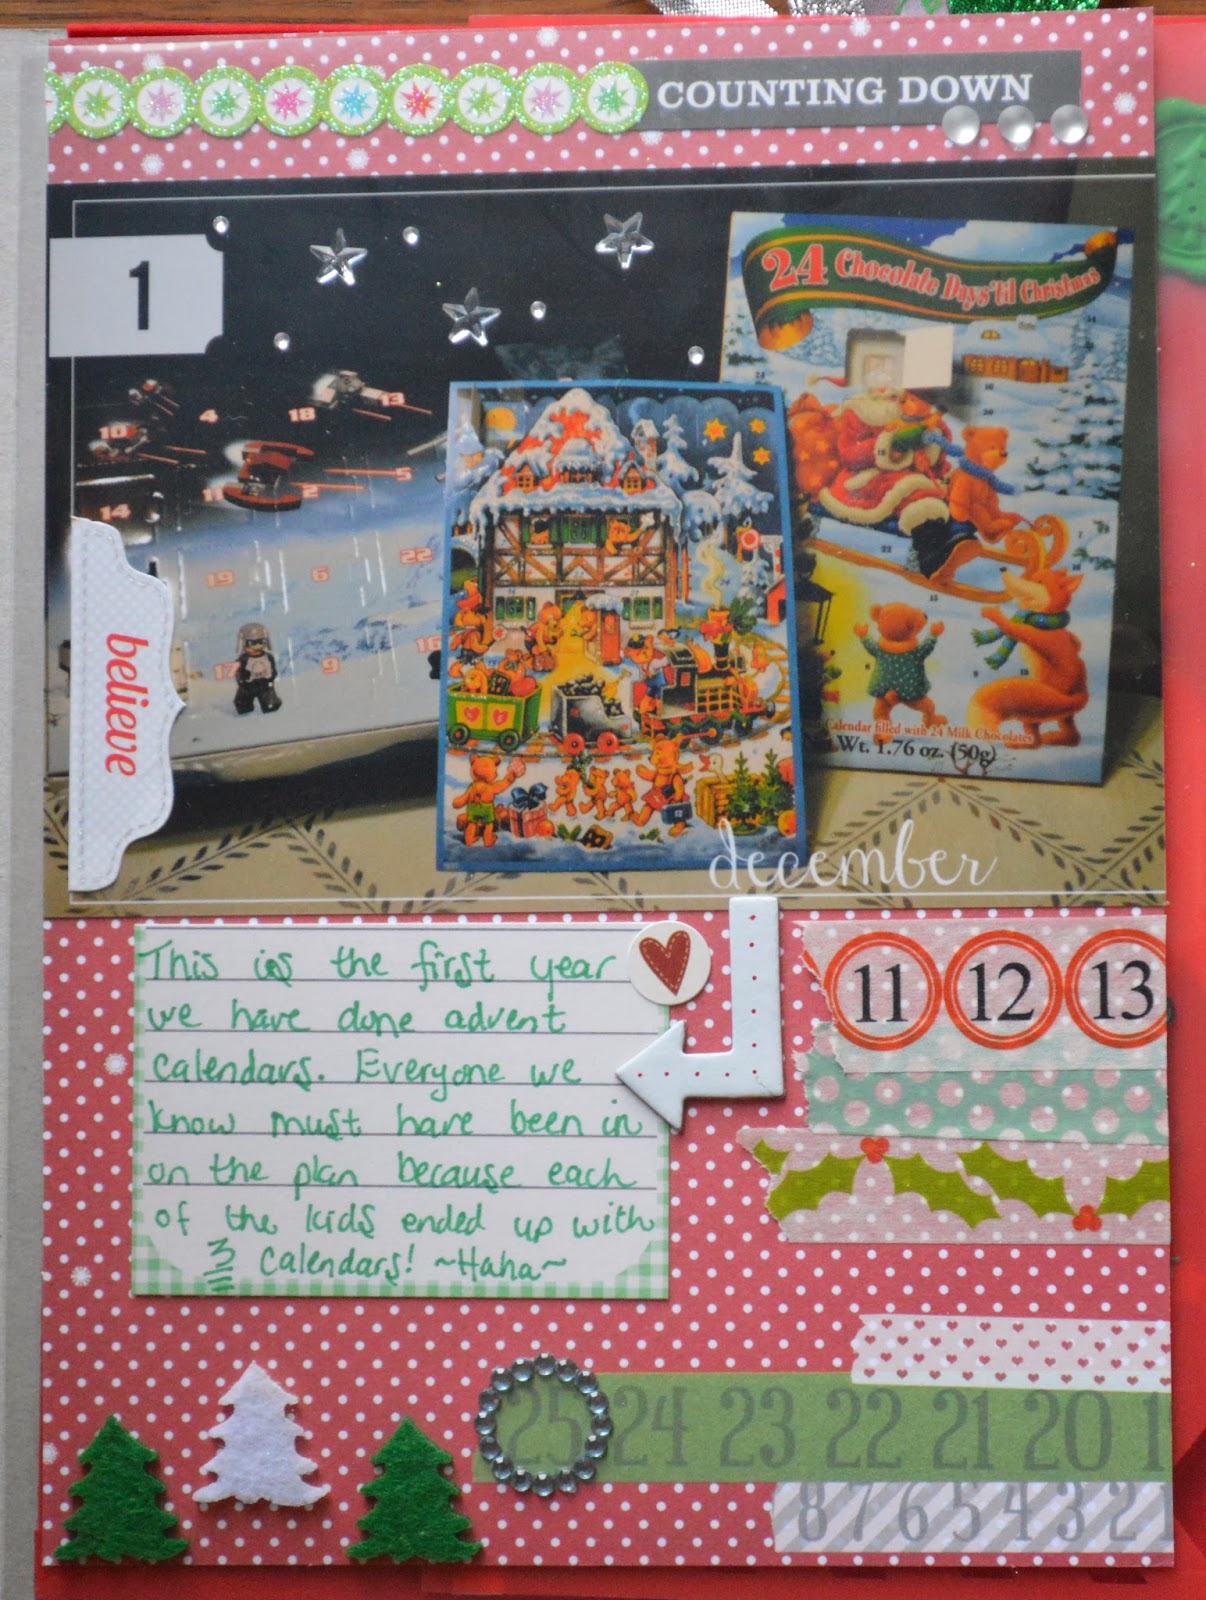
For Day 1: I added in a pic and story of our advent calendars. The overlay is a freebie from A Vegas Girl at Heart, the sticker boarder above is from Doodlebug boarders as well as the "believe" tab on the photo and the word strip again from Chic tags. I added in the left over stars from the front of the intro page to the pic and some rhinestones by Recollections. Below the pic I added in a half journal card from Gossamer Blue Life Pages kit. The arrow is Studio Calico, the trees are felt trees from Michael's $1 rack. The washi tape on the right of the page are from Teresa Collins "Santa's List" collection and My Minds Eye "Magic" collection.
Here I used washi tap from the OH Deer Me (by freckled fawn) embellishment kit. I ran it up both sides of the fold (front and back) to create a boarder and hole punched that so I could place it in the album.
Here is a photo of the letter so you can see it is able to be open and read without any hassle.
Finally here are the foundation pages for Day 2 and 3&4 (on one page). As soon as I have their story and finished pages I will post them as well!
This is an 8x8 page protector from We r, from Target. The top 2x8 insert is a cut paper from Teresa Collins "Santa's List" 6x6 notepad. And the 4x6 title card is from Simple Stories. The bottom green grid card is from We r notepad from Target as well. Becky Higgins had a special on HSN for these overlays (part of the Just Add Color Collection).
These are all the backsides of the same products listed above.
Hello again... We are doing good. I made it through one whole week with everything and full steam ahead still!!! Let's just jump right into this weeks adventures!
Day 15: North Pole Village
I had seen a website that you can make gingerbread houses out of graham crackers and I KNEW we had to do this. We have for the last several years made them old school style but they were so difficult with letting them dry and settle and then hours later they fell apart. So I figured this would be much simpler. I added in another find: Christmas trees out of ice cream cones. Jonathan had made the some examples for the kids and left a note asking them to finish the village for him. (PS. I know the note says day 12, somewhere along the way I lost track of my days and just made them up! oops!)
You can see my tree and house behind Jonathan.
All the fixins! Oh yummy! I bought ordinary vanilla frosting and mixed in green food coloring to make it blue.. the rest of the stuff general candy and Wilton's cookie decorations. Cookie glitter tubes.. those were fun!
OH MY GOODNESS...!!! I LOVE these little gingerbread cookie decorations from Wilton... how stinking cute are they? The baby, the cat and dog...!!!
YAY, I LOVE how this turned out.. this is their North Pole Village! The kids did SUCH a good job!
I LOVE the gingerbread family I found.
Day 16: Fishing
I was soo tired and had to change around my calendar. I am surprised it actually took this long. I added in this classic gem: Gold fish cracker fishing. I discovered the fishing pole in the kids bathtub (who knew that was there, hmm?) And thought voila! Blue food coloring and DONE.. night night mommy!
Day 17: Gotcha!
I found my mojo tonight! I even also discovered that my son will not indeed sleep through anything! UH OH! This was a fun one. I found these headbands at Michaels and then snuck into the kids rooms and put the headbands on them. Now for my son I discovered I was playing with fire because I took it that one step further... who me? Nah!!?? And HAD to put a fuzzy red thing on his nose... well between the tickles of the fuzz and the itch of the tape he moved about all of the 100 times I did this.. but I would NOT give up until I had the picture or I was caught... so scary! With my daughter I decided to skip the fire playing and just place the glowing necklace on her neck rather than around it. Note: neither of them liked the headbands on their head but it worked. Then I printed the pictures up and left them with Jonathan so that they could see it in the morning. They cracked up! :)
The pictures!
Day 18: Sick day
UH OH, someone touched him! I wasn't sure who or when but here is what they got in the morning. A sick elf :( they both blamed each other but in the end the learned their lesson... I think!
Everyone has asked about the IV he has. It is a mini glitter tube from the Dollar rack at Michaels. I emptied the glitter out and added food colored water to the tube and hot glued the end back in so it wouldn't leak. Then I used some plastic string from a Kreative Kids kit I got (at Joanns) and hot glued that into the end of the tube. Then I just band aided the insert to his arm.
Day 19: Christmas cards
Phew, Jonathan is feeling much better!!! So tonight he made each of the kids Christmas cards with Foamies stockings from Michaels he also used a book of stickers and Foamies letters kit to write their names. After he decorated himself he left enough for the kids to make cards for other loved ones so we could finally send them out.
Day 19 addition... YAY good reports from school so Cade got his door HALF wrapped. His listening skills are still rough so as soon as we master putting our shoes on / away without being asked 12 times he gets the rest of the door wrapped.... hopefully BEFORE Christmas!!!
Day 20: Elf yourself.
Jonathan had a QR code for the kids to scan on the Ipad and watch a funny video.
I went to this website: Elf Yourself and made a video of all of us including Jonathan jamming to Christmas tunes as elves. I then downloaded it (for $1, why not?) and uploaded it to YouTube. I then used that link and went to QR Code Generator and printed it at home and left it in his lap. Note you CAN change the color so I did mine to green it is on the right hand side of the screen in the top options.
In the morning the kids were able to watch the video and cracked up. There were 5 options of videos so I downloaded another one ($1 again.. so priceless) and emailed it from Jonathan.
**If you are not familiar with QR codes there are free apps for them on your smartphones and it is a GREAT way to share things via scrapbooking or card making! As you can see I can slip this into my scrapbook and VOILA.. memory of a lifetime!**
Here is the video from the QR code! Hilarious!
Day 21: Hanging around
Lost my steam again! After a very eventful day of soccer and working all night long I was exhausted. So quick and simple was the game. I also messed up on my calendar and duplicated something I had done, oops! So I dug through my stash and found this garland (from Michaels) and got glued his hands to the bottom of it and hung it over the stairs so the kids would see it when they woke up in the morning and went down stairs to breakfast. Easy and done.
Well we are finally home in my space where Jonathan has free reign to go CRAZY... now the challenge begins with work and soccer and life... let's hope that I can keep up! It was a GREAT and fun week. Jonathan loves the house see what shenanigans he has gotten into!
Day 8:
I took a garland with bells (bad idea it was noisy!) from Michaels and hung it with some gift ribbon and a Santa basket (also from Michaels) Hung them between the kids rooms with a good morning note.
Day 9: Lincoln Logs
My daughter had this buried in her closet. I tried the Lego house I have seen on Pinterest but I was too impatient digging through tubs and tubs of Legos to find the pieces... this was simple and cute and super quick!
Day 10: Christmas tree with stocking gifts
I found this mini tree at the dollar store. So clearly I HAD TO HAVE IT ;) (and the string of lights) the skirt and ornaments are from Michaels. Jonathan got himself tangled up decorating and left the kids stockings with little gifts in them.
Day 11: Cheerio Donuts
Classic! I even convinced my husband to bring donuts home and left them with the Jonathan donuts! I even used some felt I had and made him a little apron. My husband laughed and said he looked like a girl. Nah ;)
Day 12: Grow me a friend!
Jonathan misses his friends so he asked the kids to grow him some. I put the Elf one in the water to get it started. I found these at Michaels and they get 6x's the size of the original. They can choose to grow the other ones whenever they wanted to.
Day 13: Mirror elf
Well it was a tough couple of days. My son got 'in trouble' in school. He is in Kindergarten and apparently has been having issues focusing.. dancing around and singing. We were sad to hear that, so was Jonathan and Santa apparently. Tonight Jonathan redecorated the bathroom with window clings (From Michaels and Target) and wrote a reminder note "Be good, Santa is watching" He even wrote Cayden's name on the Naughty list and Taryns' on the Nice list. We have had some home troubles getting him to listen too, ugh! So hopefully this will whip him back into shape!
Day 14: Wrapping it up
Tonight Jonathan wrapped my daughters door in paper and not my sons. This was hard to not put into action but since it was the weekend we hadn't had a "good boy" school report and we really wanted him to learn a lesson. Plus we are really trying to get him to listen better. His behavior is over all very good for a 5 year old boy, but the constant nagging of saying things 2-5 times is wearing us thin. Jonathan left notes on both of the doors.